
Increasing the value and visual appeal of your home doesn’t have to be costly or involve expansive renovations. There are countless home improvement ideas that fit right into small budget DIY that can have a dramatic impact on your home – including adding decorative molding to flat doors.
This is a super simple renovation that you can tick off your to-do list in no time, and with just a few simple materials.
The best part? It looks amazing when it’s finished and will add tremendous decorative depth to your living space. PrettyHandyGirl’s Brittany Bailey featured this project on her blog and you can see the difference in these before and after shots!
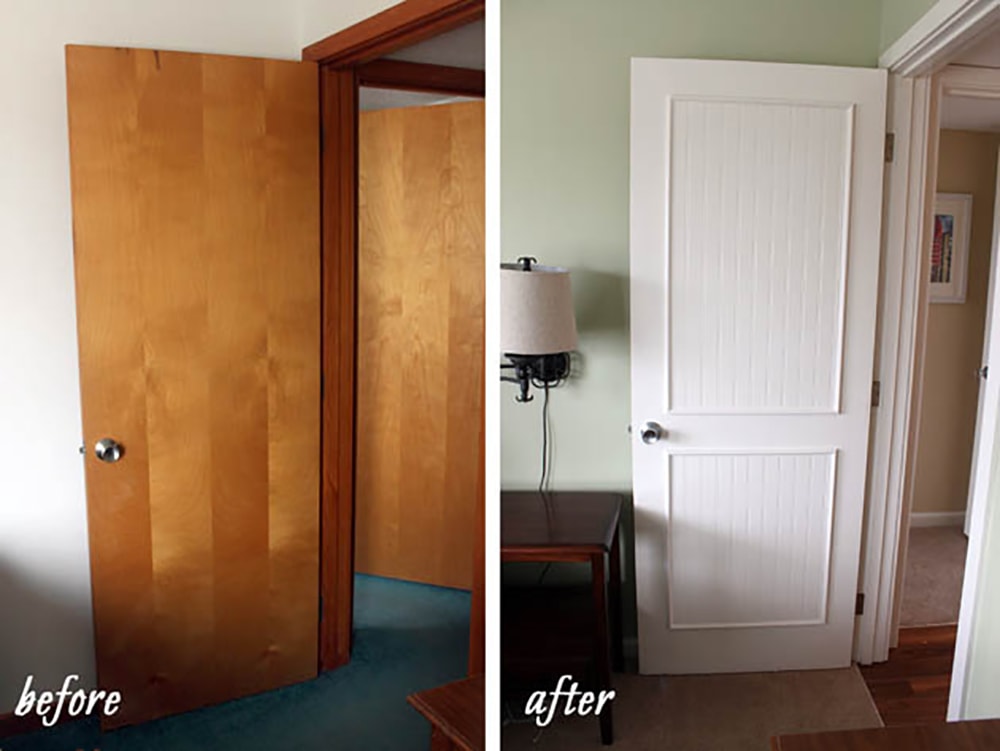
Talk about an incredible difference.
But why add molding to a flat hollow door when you can just purchase sturdy decorative doors?
That answer is as simple as this DIY project:
- Decorative slab doors vary in price from $30 to as much as $300 or more
- The materials to add molding to flat doors are really affordable
- You get a sense of pride and ownership in your DIY project
- It’s easy!
Brittany takes us through the handful of steps you need to create a decorative store that custom to your style and preferences.
Step 1: Get your tape measure
This is where you measure and mark your doors to decide where your molding panels will sit and what size they need to be.

Just measure in 5” from the top and sides of the door and 6” from the bottom of the door, mark your placement, then use a level to draw your lines.
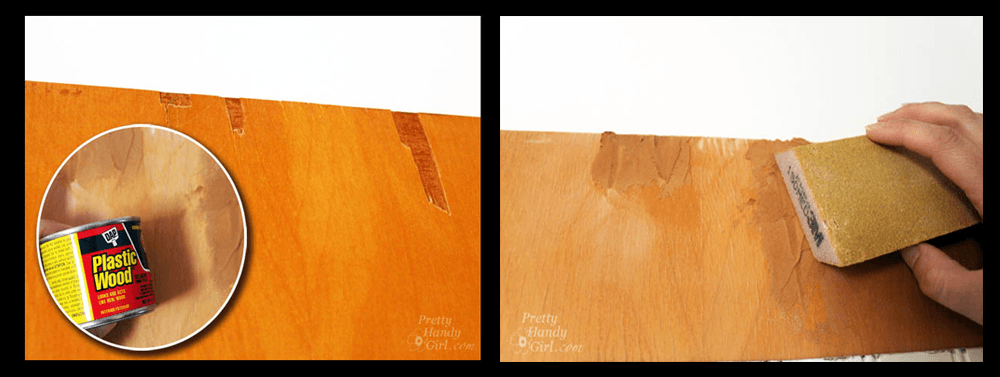
Step 2: Prep your door
You want a smooth clean surface to work on. Check your door for holes or damage and use a little wood putty to fill in those blemishes. Once it dries you can spot sand it so it looks as good as new.
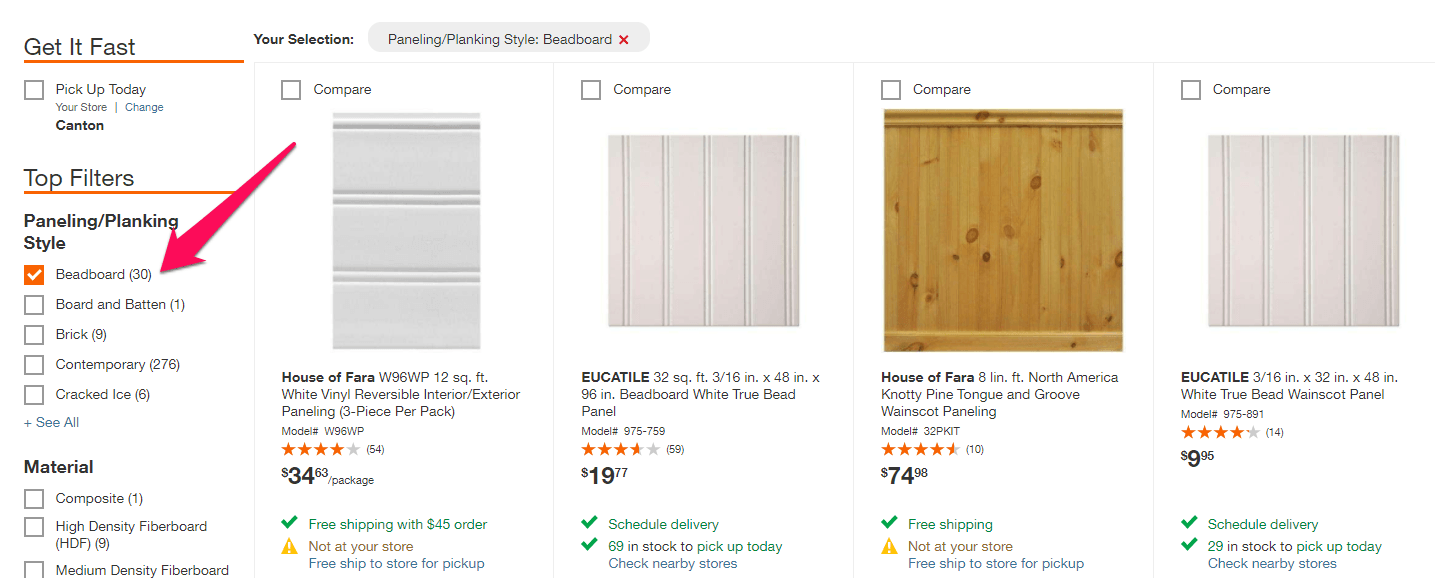
If you’re satisfied with how the door looks then get your supplies, momoldingand panel boards. You can cut it to your measurement if you’re confident or see if the folks at the store can cut it for you.
There’s some variety in design so you can find one that fits your tastes.
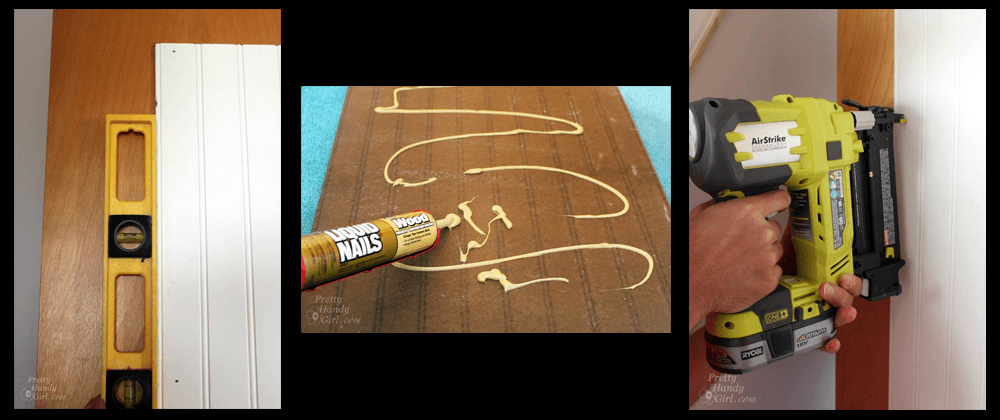
Step 3: Try not to get glue on everything
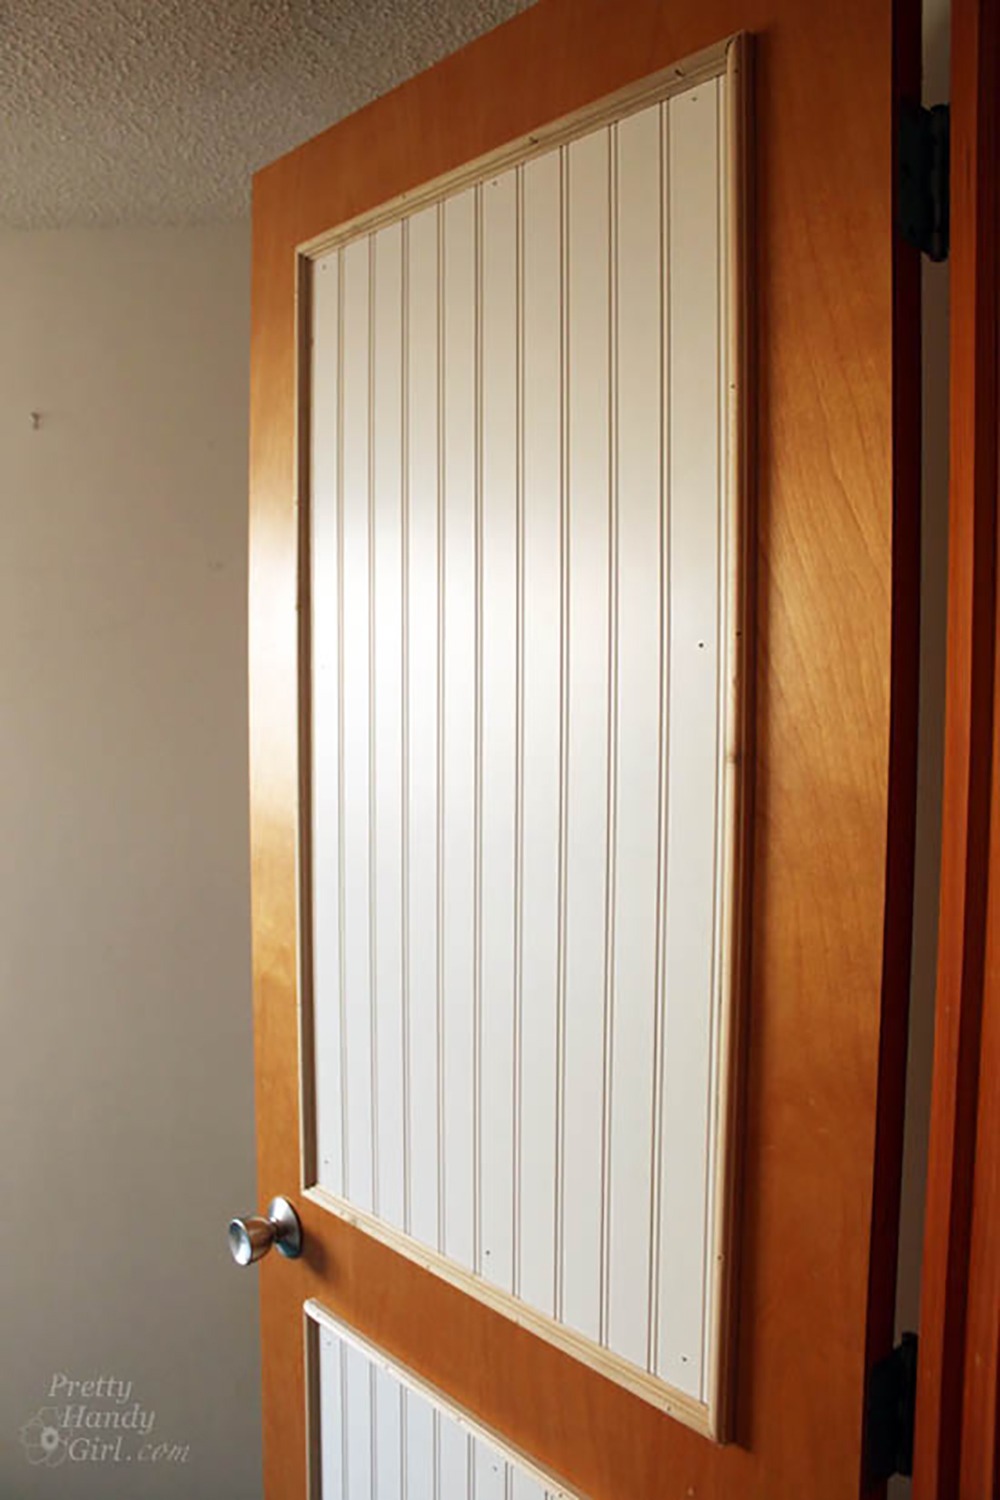
It’s time to add some style and class to your doors.
Break out your construction glue. This is what you’ll use to hold the panel board in place. Liquid Nails should suffice. Fix the glue-covered beadboard to the door and double check your placement with your level.
You still have the level, right? Don’t eyeball it! Use your finish nailer once the panel is in place to secure it. Repeat for the second panel.
It looks so much better already but we’re not done yet. Now you get to complete the look with trim.
Step 4: Trim it up
Measure (at least twice) your trim so it lines up and fits around the panel, then take to your midar box to get the properly angled cuts that fit snug at the corners. Once your pieces are cut check the placement and that the pieces fit nicely together before using the nail finisher to secure the trim.

Be sure to use wood putty to fill in holes around any finishing nails that were sunk.
Step 5: Almost there!
Even a flat door can come to life with a small investment and a little time. The finished and attached moulding already looks stunning…
but there’s that final step to really solidify it as part of the home.
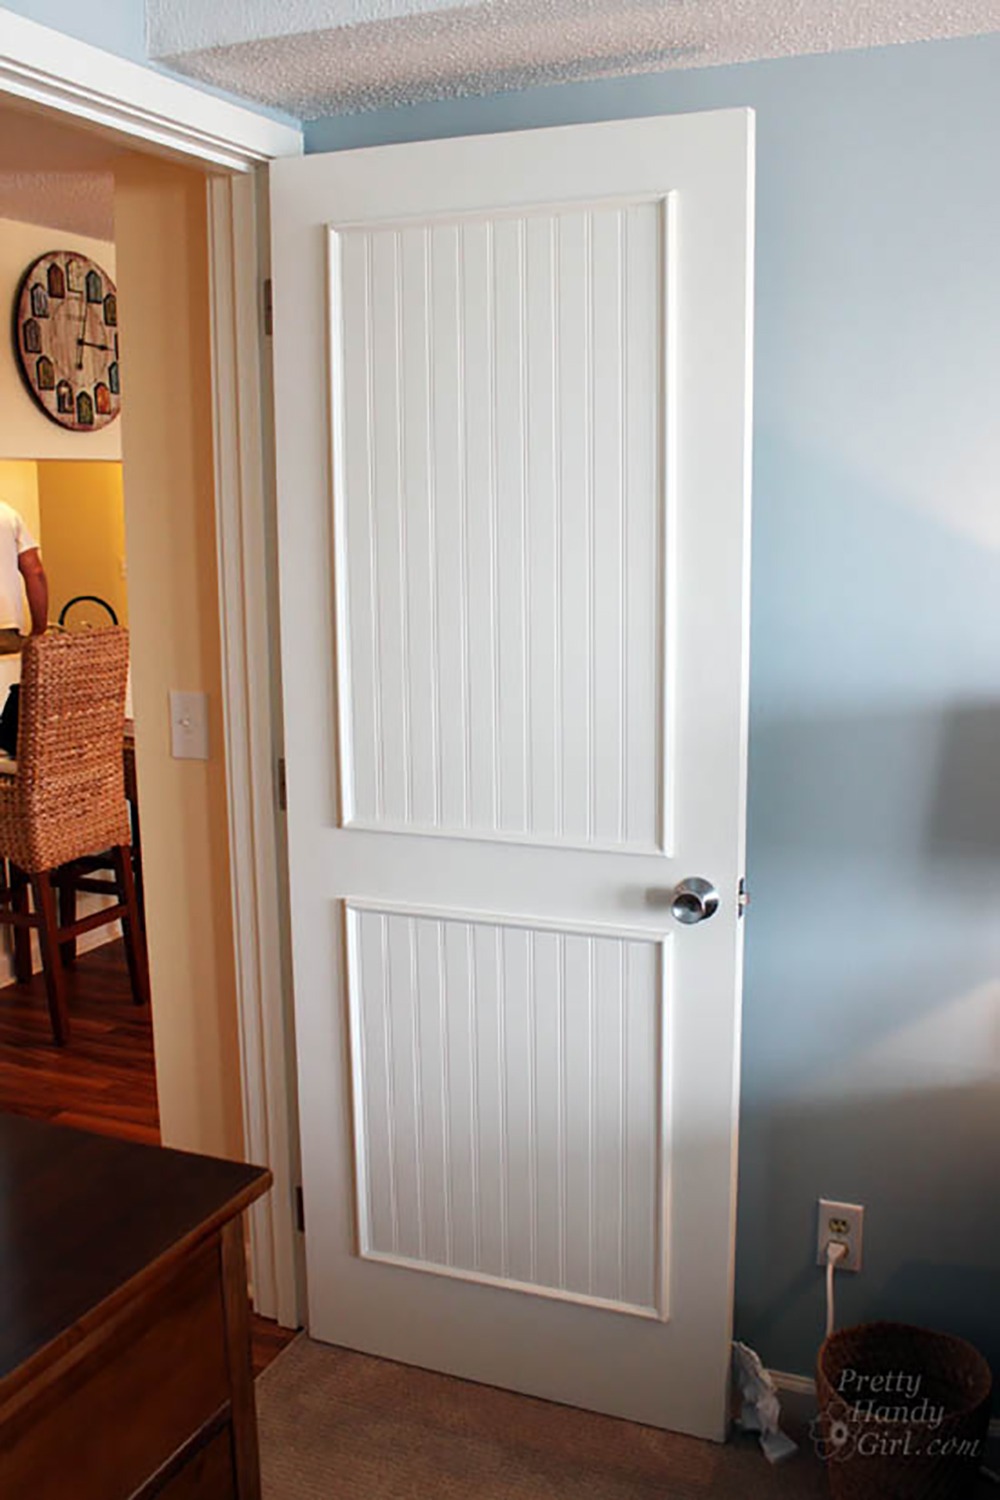
Add the appropriate paint to your project and you’ve got a finish paneled door that took very little time and money to create – and it will make a huge visible impact on your living space.
What’s next on your DIY home renovation checklist; is it time to upgrade those drab flat interior doors or is there another home improvement project waiting in the wings?
Materials and Supplies
Here’s everything you’ll need to add molding panels to a flat door:
- Beadboard panels
- Molding to frame panels
- Tape measure
- Pencil
- Level
- Construction glue
- Latex paintable caulk
- Finish Nailer
- 1 1/4″ finish nails
- Painter’s tape
- Hand saw
- Miter box
- Eye protection
- Hearing protection
- Plastic wood putty
- Putty knife
- Sanding block