procedure for color washing beadboard?

Come share your ideas for sprucing up your property.

Moderators: Greg, Mark, mhrAJ333, JD

Locked
mjbrown65
Posts: 6
Joined: Tue Feb 10, 2009 9:05 pm
Location: Hartland, Maine

morning folks...
i am new to your forum and VERY glad i found it.this is soooo informational. i have read almost EVERY thread and very impressed with the help you all give.

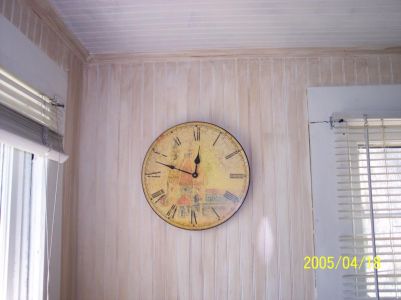
this morning i read the thread , and cant remember the womans name , but she had a pic of some color washed bead board on her walls. this really caught my eye.

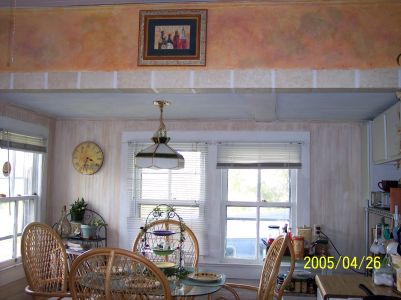
i own a mid to late 60's mh, make and model unknown due to previous reno's . a few years ago, i added a 16x40 addition on the back, that is sunken(lower than mh floor level, not sinking...lol).due to this add, my kitchen and dining rooms are very dark, and the wife and i are looking to lighten things up a bit. we both like the look of the color wash.

come warm weather, i am removing all the paneling so as to re-insulate the walls , and would like to use this procedure.could you please tell me how this is done?


i did my best to add a pic, hope it works..


thank you ,

mikeImage
circa 196? mobile home(model unknown)
12x60
16x40 addition
Harman P38 pellet stove
1 1/2 yr old english mastiff/flatcoat retreiver mix
User avatar
Yanita
Moderator
Posts: 3369
Joined: Sat Feb 17, 2007 10:16 pm
Location: Eastern N. Carolina

Hi,

Welcome to the site...

Color washing huh, well it is very easy. But would need to know what you are trying to achieve.

I have done color washing in my home. in the diningroom I did textured walls, painted with a caramel color then color washed with a burnt umber glaze.

There are many variations to washes. There are milk paints, glaze washes, paint washes...could you find a pic somewhere online and post a link so I can see what you are looking at or for?

Yanita
The difference between success and failure is who gives up first!
mjbrown65
Posts: 6
Joined: Tue Feb 10, 2009 9:05 pm
Location: Hartland, Maine

Hi Yanita,
thanx for the reply. what i would like to achieve is the look in the pic of my previous post...i hope it came thru.

after talking more with the wife, she has decied that she doesnt like that look now because "it looks unfinished" to her.

i like the country look and this caught my eye right away. i think she is still mad because i said i want all natural pine in the living room, and there was going to be no paint.

she and my daughter think they are the next martha stewart tag team. LOL. i am still working on her for this color wash though.

i like the look of the wood grain showing thru, and the grooves in the bead board having the paint.


mike
circa 196? mobile home(model unknown)
12x60
16x40 addition
Harman P38 pellet stove
1 1/2 yr old english mastiff/flatcoat retreiver mix
User avatar
Yanita
Moderator
Posts: 3369
Joined: Sat Feb 17, 2007 10:16 pm
Location: Eastern N. Carolina

Good morning Mike,

The look in the pic is fairly easy, but most of these techniques are time consuming.

In the pic I was not sure if that was what you have and wanted to change or what you were looking for.

To get that look is pretty easy, finding the color combo's can be a little more challenging.

For the pic, it appears on my screen as painted white, or maybe an eggshell/ecru color. Then color washed with either a glaze or diluted paint. Regardless of the products the wash it self can be applied a variety of ways. With mine I have always used a damp white cotton rag, dipped into either a very diluted paint or glaze.

Apply to wall with the same motion you would use if "washing" the wall. To give you time to play with the wash there are things called paint/glaze extenders. These are additives that you put in the paint/glaze, and it slows the drying time to give you more time to find the finished look you like.

Once you apply the paint/glaze wash wipe off as much as needed/wanted with a clean, damp white cotton rag. others like to use expensive designer brushes, crumpled plastic bags sponges etc...when doing this work in 3x3 foot square areas, keep moving so you do not end up with a dry edge.

I recommend that you try various ways on a piece of board or inside your closet. You could actually try your techniques anywhere, heck your going to have to paint first anyways.

Now I noticed you said you like the wood grain to show through. Another technique is called milk paint. High dollar if you choose to buy the premade. You can do this with your choice of white latex and dilute with water till you find the transparency you like.

Another option would be to try out various gel stains, these are easy to use and when dried the color is there but the wood grain shows.

Hope I have helped and not confused.

Yanita
The difference between success and failure is who gives up first!
mjbrown65
Posts: 6
Joined: Tue Feb 10, 2009 9:05 pm
Location: Hartland, Maine

thank you very much...you have helped alot. now i just need to convince the wife.

she says i need to worry about the fixing part, and she will worry about the fixing UP part.

i told her dont be that way

thank you again,

mike
circa 196? mobile home(model unknown)
12x60
16x40 addition
Harman P38 pellet stove
1 1/2 yr old english mastiff/flatcoat retreiver mix
Trudi
Posts: 174
Joined: Fri Feb 08, 2008 9:28 pm
Location: N.C. Foothills

Hi Mike, I nearly fell out of my chair as I was reading your post and scrolled down to see my beadboard wall. This was a look that I copied from an Italian restaurant, that was made to look rustic and Old World. The other part of mykitchen was textured with joint compound, and painted and glazed.

In this case, the beadboard was extremely easy to do, because I wanted an old worn look. If I remember correctly, the white underneath is just the primer. I either used a mocha glaze (ready made from Lowe's) or a clear glaze to which I mixed an umber paint. (Craft section at Walmart) Sorry, I've done both and can't remember which I did here.

I used an old t shirt scrap, and washed it on in an up and down motion, using a light touch, going with the beadboard. I did NOT use a circular motion this time because of the boards going vertically. It went really fast. Your wife is right; in that picture, it was unfinished, at least the surrounding areas of trim, etc.
Trudi
Posts: 174
Joined: Fri Feb 08, 2008 9:28 pm
Location: N.C. Foothills

Here's another shot, before the window trim went from white to "brick," and the blinds went bye bye. :D

Image
mjbrown65
Posts: 6
Joined: Tue Feb 10, 2009 9:05 pm
Location: Hartland, Maine

trudi,

thank you very much.

i love the look but the wife is holding fast.she says i need to worry about the hammers and she will worry about the paintbrushes.

i told her she is being mean and she says to deal with it, i'll sleep better that way( i wonder if i should start sleeping with my eyes open) LOL.

thank you again very much,

mike
circa 196? mobile home(model unknown)
12x60
16x40 addition
Harman P38 pellet stove
1 1/2 yr old english mastiff/flatcoat retreiver mix
Trudi
Posts: 174
Joined: Fri Feb 08, 2008 9:28 pm
Location: N.C. Foothills

You're welcome, Mike. We ladies do like to do up our homes as we like. Hope you find something you both like. Keep us posted.
Locked
  • Similar Topics
    Replies
    Views
    Last post