
So how many times have you fixed your kitchen drain only to find out it still leaks? How many times have you bought parts only to discover that they don’t quite fit? Or maybe your installing a new kitchen sink and want all the right drain parts. With our complete kitchen sink drain kit, you can throw away that drip bucket and do it right. We’ve scoured the country for the right parts to make installation a simple do-it-yourself job, with no leaks the first time! The real difference is in the various washers that we use to help ensure a leak-free installation. Nobody but us offers this kit.
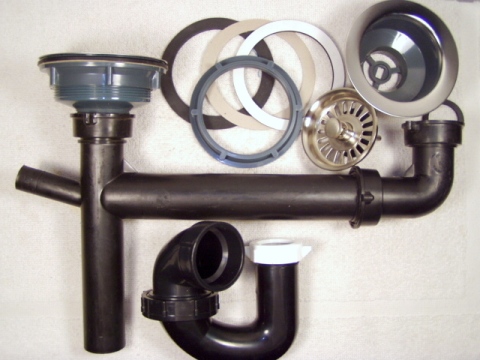
Purchasing a complete kitchen drain kit includes all pieces shown above.
Some of you may question the reason for also replacing the baskets. Many leaks happen because water is leaking past the old hard putty, or because of a bad drain connection to the basket. Plus the threads on the basket can vary greatly, causing more grief when trying to make tight drain connections. To ensure the best leak-free connections for a problem kitchen sink drain, we recommend replacing the baskets, drain pipe and p-trap. Everything in this kit fits perfect, so don’t ruin the job by trying to reuse old parts.
INSTALLATION INSTRUCTIONS
Step 1 – Remove old drain parts.
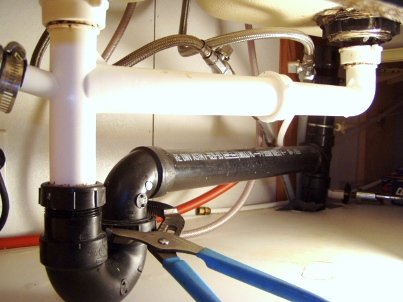
Disconnect the p-trap from the drain line by unscrewing the nut shown in this picture. Keep a bucket handy for catching any drip. You don’t need to shut the water off, just remember not to use the faucet or you’ll get a lap full of water!
When you install the new drain, the new p-trap will simply screw back on here eliminating the need for any cutting and gluing. No thread tape or sealant is necessary when reconnecting. If you do not have this type of a p-trap, then some modifications will need to be made.
Unscrew the old drain nuts from the sink basket. Also, if you have a dishwasher, disconnect the hose from the nipple. Remove and discard the old drain and all the old nuts and washers.
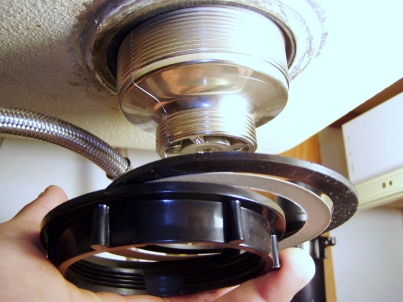
Step 2 – Remove baskets from the sink.
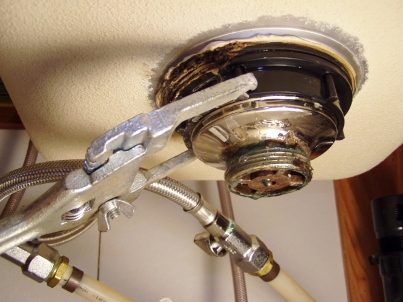
Using a spud wrench, loosen and remove the nut from the sink basket. If the basket spins while trying to remove the nut, jam a pair of pliers into the cross-pieces of the basket and hold while turning the nut. Once removed, clean away all the old putty and gunk. The spud wrench is available from any good hardware store or available on our plumbing parts page.
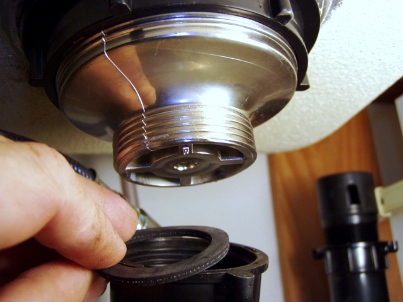
Step 3 – Install new sink baskets.
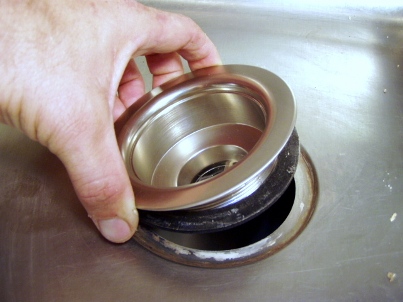
Again, be sure the area above and below the sink is clean and free of any old putty or gunk. Unlike most basket installations, no plumbers putty is needed. A special spongy washer is used instead of the putty. If you received a washer with a white backing, remove the backing, center it around the hole, and stick it to the sink. Set the basket into the hole.
If you received a washer with no white backing, simply slip the washer over the basket, and insert the basket into the hole.
From underneath the sink, secure the basket with a rubber washer, cardboard washer, and the nut. The cardboard washer helps the nut slip for easier tightening. Be sure the basket is centered in the hole while tightening. Snug with the spud wrench, but no need to overtighten. No plumbers tape or sealant is needed to install the sink baskets.
Repeat for the other sink basket.
Step 4 – Connect the drain.
Loosen the middle nut on the drain and slide the extension in or out to match the width of the sink basin. Add a cloth washer to each side and screw the nuts to the sink baskets. No tape or sealant is necessary.
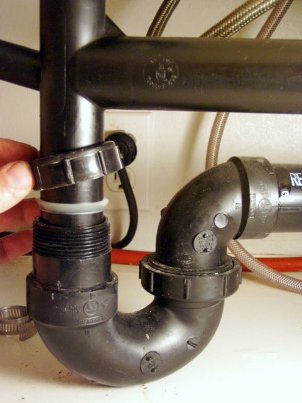
Connect the p-trap as shown above. Note that the v-end of the plastic washer is pointed down. Again, no plumbers tape or sealant is needed.
Step 5 – Enjoy your new mobile home kitchen drain – No leaks!
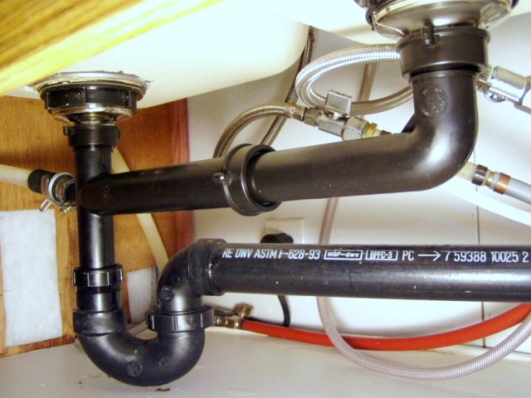
Check that all nuts are tight, but don’t overtighten. If a v-shaped plastic washer comes loose, be sure the v-end is always pointed towards the pipe. When you tighten the nut, it should push the ‘v-end’ into the pipe, sealing it.
If you have a dishwasher, hook it back up. Now turn the water on. You should be leak free!