
Since newsletters seem to be a thing of the past, I'm going to make a point of posting more repair tips to the forum. Today let's talk about replacing a water riser. A water riser is a device that brings the water up to your home from a pipe below the frostline. It kind of works like a hydrant. When you shut it off, the riser will empty itself of water. Many risers also have a built-in heater to keep them thawed during the winter.
Many of you who live in a park probably won't have to worry about a water riser, as the park manager will take care of it. If you own your own land or lot, then here's how it's done. Even if your not the one doing the job, at least this will give you an overview of what to look forward too.
Obviously, start by shutting off the water to the riser, and unhooking waterline from home.
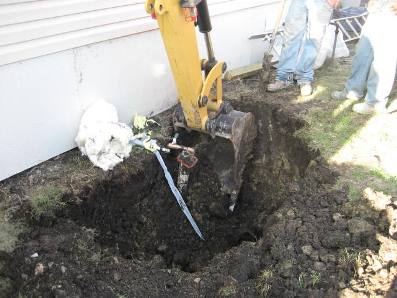
First, you need to dig a hole down alongside the riser. The hole needs to be big enough for a man to get down . Depending upon what part of the country you live in, the bottom of the riser will be 5-6' down (below the frostline).
The bottom of the water riser simply screws into a threaded fitting. You'll need two good-sized wrenches to break the seal. Then simply unscrew the old waterline by turning it completely around & around (in many cases).
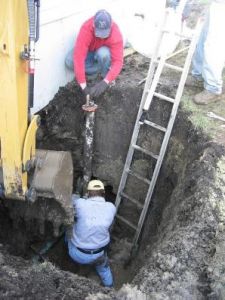
Backpressure of the water may create a mess down inside your hole. (hitting a waterline with the backhoe will do the same! LOL). Wearing waders would be advisable, but try telling that to this crew tho as they are wearing nothing but their shoes and are knee-deep in muck! Maybe they hope to be showcased for Dirty Jobs on Discovery.

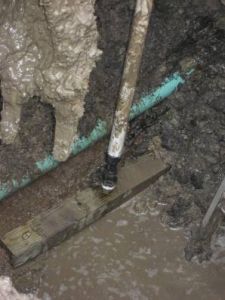
Once the old riser is removed, the new riser screws into the same fitting. Have the new riser ready to go so you have a minimum amount of water backpressure running into the hole. Notice the blue-green sewer line towards the back. Tighten all fittings, turn water on and check for leaks.
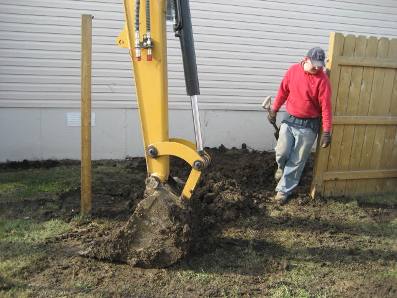
If all is well, carefully backfill the dirt into the hole. Even tho all that dirt came out of the hole, it never all seems to fit back in!
Before hooking up riser back to the home, be sure to blow-out the riser by turning on the water and letting it run for a minute. This will clear-out any dirt that may have gotten into the riser during the installation process.
An experienced crew can replace a normal riser in 30-90 minutes (and charge anywhere from $700-$1500!)
Mark
