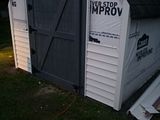
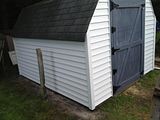
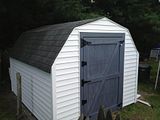
Shed rehab/upgrade

Repair help for the do-it-yourselfer.
For mobile home parts, click here.

Moderators: Greg, Mark, mhrAJ333, JD

Locked
Spydrweb1977
Posts: 34
Joined: Wed Aug 22, 2012 7:44 pm

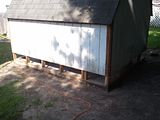
My shed had a fair amount of rot around the lower edge and the double doors were shot...

So, it was time to replace or repair it. I chose to repair and upgrade it because the cost to buy a new unit is about triple of what I will have invested in repairs and upgrades when I'm done. The total cost will be less than 400.

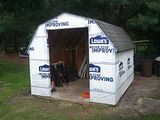
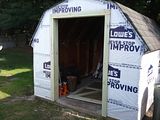
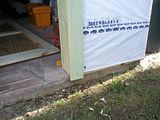
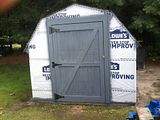
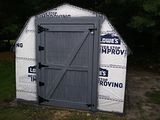
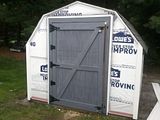
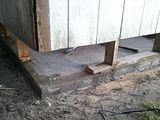
It is an 8x10 mini barn style shed on a cement slab base, about 25 years old. There was some sill rot in one corner, and the lower few inches of plywood siding was rotted all the way around. The doors and jamb were trash as well.

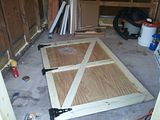
I decided to go with vinyl siding to match my home and a big single barn style door instead of double doors.

I will post some more pics when I'm done.

Thanks for looking.
Image

Image

Image

Image

Image

Image

Image

Image
ponch37300
Posts: 622
Joined: Tue Nov 11, 2008 6:12 pm
Location: wisconsin

It's really funny you posted this! I just helped a neighbor rehab his shed in almost the same way you did. Yours looks like it was in better shape to start with. We cut the bottom 20" off the panel siding and put new in and put 1x4 trim on. Redid the rotted soffit and fascia and a new roof and a new door. It took us longer then just building a new one but it saved him some good money. In the end he has a nice shed that at least now is waterproof.

Yours looks nice and I really like the bigger door.
User avatar
JeffInFL
Posts: 171
Joined: Wed Apr 24, 2013 6:52 am

Looks good! I have 2 older sheds in my back yard that are falling apart. I hope to do the same thing one day.
User avatar
Greg
Moderator
Posts: 5696
Joined: Wed Feb 28, 2007 8:01 pm
Location: Weedsport, NY

OK since you two are "experienced" you can come to Weedsport and rehab my garage. It's a 12x24 metal garden shed with an overhead door. The bottom of the metal is rotted . I'm planning on replacing with either T111 or smart board and a pressure treated bottom sill.

Greg
"If I can't fix it, I can screw it up so bad no one else can either."
bobfather99
Posts: 195
Joined: Fri Nov 13, 2009 2:09 am
Location: Indiana

I love projects like this.
Great part is that you can reuse what isnt rotted out, and make it structurally sound and look way better. Its also nice because most of the new "sheds" out there are built very cheaply, and wear out quicker.
Tip your bartender.....
Steve S.
Posts: 117
Joined: Sat Apr 21, 2007 7:41 pm
Location: Maine

bobfather99 wrote:I love projects like this.
Great part is that you can reuse what isnt rotted out, and make it structurally sound and look way better. Its also nice because most of the new "sheds" out there are built very cheaply, and wear out quicker.
Me too...I refurbed my 8X10 shed two years ago. Mine had no foundation whatsoever, floorjoists just sat on the bare ground and rotted away. I rebuilt two sections of floor and header joists out of pressure-treated lumber and had to jack up one side of the shed at a time and sister the new joists into whatever pieces of the old ones were still sound. Parts of the plywood floor and some of the sills were rotted as well. I built a foundation from 4 deck-blocks with two 4X4s atop them...then I somehow managed to get the shed with new floor joists on top of the 4X4s using only bottle jacks on all the corners. Now I have a nearly-new shed for a fraction of the cost to buy a new one...and I had loads of fun doing it! I guess we mobile home owners know how to get by on the cheap.
Cheers, Steve
Spydrweb1977
Posts: 34
Joined: Wed Aug 22, 2012 7:44 pm

Thanks everyone!

Just a couple quick updates. Trimmed out the front and got vinyl about half way up the front after work tonight.

Part of the reason I'm posting this is because there is not much for walkthroughs or images on the web for a project like this. So,hopefully it will help a few people figure out how to do it themselves.

Corner,j-channel, and starter strips up.
Image

Siding about half of the way up the front.
Image
Spydrweb1977
Posts: 34
Joined: Wed Aug 22, 2012 7:44 pm

Quick update, got three sides done... just have the back left to do. I think I'm going to finish the inside and use it as a workshop.

Image

Image
Spydrweb1977
Posts: 34
Joined: Wed Aug 22, 2012 7:44 pm

So,

I got the siding done all the way around, and I put in a 12 by 12 louvered vent in the back so I can put in a fan for ventilation. I have decided to turn it in to a small workshop/storage area.

I plan on insulating the whole thing, and I am hoping someone can chime in with some tips for the roof.

Option one- add a ridge vent, and soffit vents and then seal the rafters with sheet foam insulatiion, allowing for a small ventilation space above the insulated cieling.

Option two - no ventilation in the "cathedral" cieling and just spray foam the whole thing and cover it with drywall..

Any thoughts on which option would be better?? I know not ventilating can lead to moisture problems, roof warping, etc... but I have seen arguments both ways.

Thanks.
ponch37300
Posts: 622
Joined: Tue Nov 11, 2008 6:12 pm
Location: wisconsin

In my opinion soffit vents and ridge vent is the way to go. Use foam baffles to keep the insulation away from the roof sheathing, they sell these at box stores right by the insulation. I'm guessing this option will also be cheaper then spray foaming everything.
Locked
  • Similar Topics
    Replies
    Views
    Last post