Installing New Mobile Home Water lines
As mentioned earlier, if you’ve got the old metal galvanized pipes, you’re probably experiencing loss of water pressure and occasional chunks of rust coming through your waterlines. The only way to repair it is to replace it.
When installing new pex lines, never worry about removing the old water lines. If they aren’t in the way, let them lie.
The toughest part of replacing waterlines is working underneath the home in cramped space. But before you start doing the back stroke, be sure you understand how your home’s plumbing system functions. Basically, there’s not much to understand. In fact it can all be summed up in one paragraph.
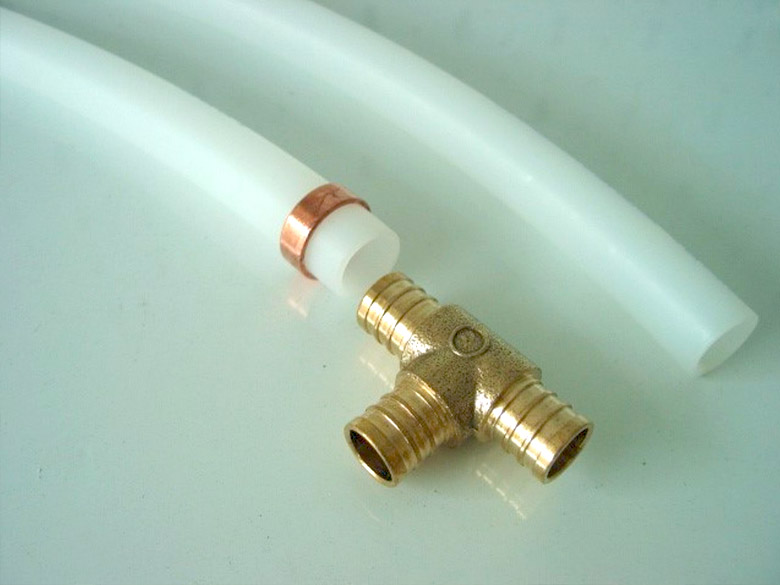
The ¾” main waterline comes into the house by the water heater and makes a tee. One side of the tee goes into the hot water heater which then feeds all the ½” hot water lines. The other side of the tee feeds all the ½” cold waterlines. Congratulations! Go pick up your diploma as you just passed Plumbing 101.
Codes
Manufactured homes are built to a HUD code. Homes built to a UBC or any other code have stricter plumbing requirements. In most areas pex waterlines are acceptable but all fittings have to be accessible. In other words, connections cannot be made inside walls or underneath floors as they typically are in a manufactured home.
For pex to meet codes under those conditions, manifolds are used. Think of a manifold as a hot and cold control panel. The hot side of your main line would flow into the hot control panel. The cold side would flow into the cold control panel. A separate water line would run from the control panel to each fixture in house. For instance, in your bathroom three ½” cold waterlines would run from the cold panel to your bathroom sink, tub and toilet. To accomplish that and meet code, each water line would need to be one long piece with no hidden fittings connecting additional pieces of water line. The beauty of this system is that you wouldn’t need to install shut-off valves at each fixture, but rather simply turn off the valve for that line at the manifold. Depending upon your area, your water lines may need to be inspected by a building inspector. Find out before starting any major work. If your area is like most, building inspectors don’t require mobile homes to meet any code but HUD.
Making a crimp connection
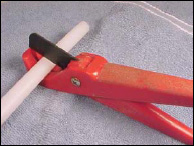
Step 1 – Using a pipe cutter, make a square cut. Remove any burrs or jagged edges.
Step 2 – Slide the correct-sized crimp ring over the end of the pex waterline.
Step 3 – Insert the fitting into the pipe until it hits the shoulder. The ring should be positioned 1/8 to ¼” from the end of the pipe. If you encounter difficulty with keeping the ring in place until crimped, gently squeeze the ring using pliers. Do not over squeeze with the pliers or you may not be able to get the crimping tool over the ring.
Step 4 – With a properly calibrated crimper, squarely center the jaws over the ring and squeeze the handle one time. If crimped more than once, the connection must be cut out and redone.

Step 5 – Remove crimper and check the ring using a GO/NO-GO gauge. A GO/NO-GO gauge will tell you if you’ve made a proper crimp. For each size of pipe the gauge will have two slots. The GO slot will slip over the ring, the NO-GO slot will not. If both slots (or neither slot) slip over the ring, then the connection must be cut out and redone once the crimper has been recalibrated. To recalibrate a crimper, one screw loosens and the other adjusts. Since all brands of crimpers adjust a bit differently, refer to your manual for more details.
Installation Tips: Mobile Home Water Pipes
Below are some tips for making installing easier.
- Purchase pex waterline in 20′ sticks or lay out rolls several days ahead of time. Straight sticks are a lot easier to feed through the belly than rolls of pex that won’t lay straight.
- Help feed long lines of pex through the belly by occasionally cutting an 8″ slit in the belly and using your hand to help feed it along. Patch the belly once the line has reached its destination and has been tested for leaks.
- Run both the hot and cold lines together. Tape them together at the ends.
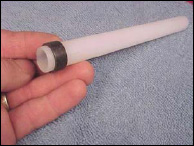
- Before feeding the hot and cold lines into the belly, label the cold line by wrapping a piece of black electrical tape on it every 5 feet or so.
- Never use a crimp ring that isn’t quite round.
- Check the calibration of a crimping tool before each project. Check by crimping a ring on a scrap piece of waterline and checking with the GO/NO-GO gauge.
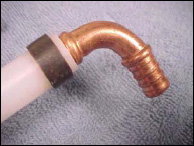
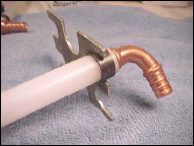
- When installing a copper to pex adapter, solder the adapter to the copper before crimping on the pex.
- Properly support the pipe on long open runs with fasteners every couple feet. Automatic fasteners make the job a cinch as they work somewhat like a staple gun.
- Do not expose pex pipe to UV light (sun) for more than 24 months.
- When running new lines, leave some slack for any future adjustments.
- But any polybutylene waterline left in your home in most cases will function properly if the plastic fittings are removed and the pipe is kept straight. Polybutylene with sharp bends in time will crack and leak.
WHERE CAN SOMEONE BY PEX TOPOLYBUTYLENE STUFF CRIMPERS AND OTHER THINGS
Hello Tom, PEX fittings, crimp rings, and crimpers are now readily available at Home Depot, Lowes, and online at places like Amazon.