Your manufactured home has a metal roof. It also leaks, and you’re tired of it! You’ve been contemplating a rubber roof, but don’t know much about it. Then read on! This article will provide you with some useful insight. Generally, rubber roofs are available in two forms – seam and seamless. You may also see other types of roofing systems advertised, but they too can generally fall under the seam or seamless category.
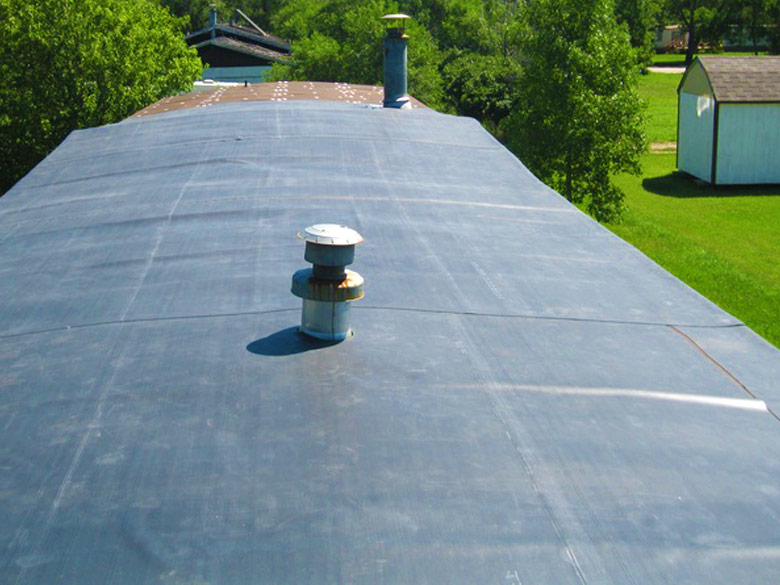
 Normally, when the subject of rubber roof surfaces, people tend to think of a rubber membrane that is stretched over the existing roof offering protection against mother nature’s elements. This is true, but the homeowners need to realize that holes have to be cut into the membrane in order for the rubber to fit around the numerous vents on the roof. The area around each vent then needs to be patched, thus creating a seam.
Seamless rubber roofs, as the name implies, has no seams. Rubber in a liquid state is poured or sprayed onto the roof curing to a one-piece membrane with no seams.
Seamed Rubber Roofing
Seamed rubber roofing can be quite challenging for the average do-it-yourselfer to install. Once the rubber membrane (sometimes called EPDM) is stretched over the roof and holes cut for the vents, the rubber is next folded over the roof edge and fastened with screws. Then, pieces of the membrane are cut and carefully glued around the vents creating a watertight seam. Those seams, however, can be proned to failure, especially if not glued properly.
Despite some disadvantages, the seamed rubber membrane does have its pluses. First, the membrane can be installed without a lot of roof preparation. Rusted or splintered metal should be removed or covered to avoid any risk of puncturing the membrane. Also, the membrane is thicker than seamless rubber, giving more protection against sharp objects or bad weather.
Seamless Rubber Roofing
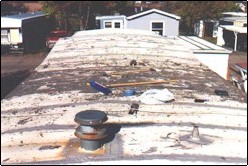 But for the do-it-yourselfer, installing a seamless rubber roof is the way to go. Not only is installation easy (but time consuming), the final result is a rubber roof with no seams. Careful preparation of the old metal roof is the key to a long-lasting seamless rubber roof. Old failing roof coatings must be removed be scraping and/or carefully power washing, especially at the seams. A wire brush installed on a hand grinder or electric drill may be a big help in cleaning-up the seams of the roof.
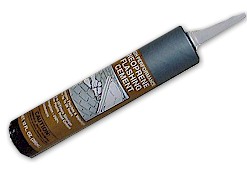
Once the failed coatings have been removed and the seams exposed, apply a bead of neoprene to all the seams using a caulk gun. Then, with a putty knife, spread the neoprene around the base of the vents creating a tight seal. Let the neoprene cure overnight. Neoprene stretches up to 400%, which makes it ideal for seams.
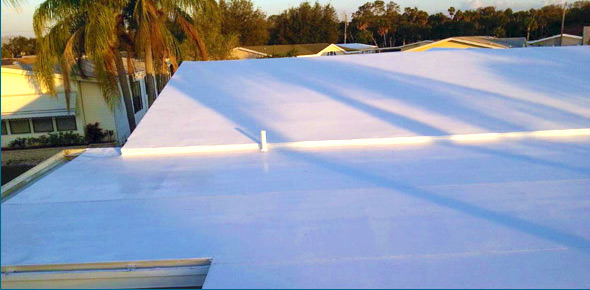
The next day, pour and spread the rubber using a long-nap paint roller. The rubber is usually white and sold in 5-gallon pails. Be sure to follow the manufacturer instructions as to how thick the rubber should be applied. Please note that most home improvement centers do not sell high-quality rubber. They sell a roof coating that looks like rubber, but don’t be fooled by it. A good quality rubber will cost you around $35-$45 a gallon, and the average home will need 20-25 gallons. Purchasing a cheaper roof coating will only cause grief later on.
But what about those corrugated metal roofs discussed in this article? To be frank, a corrugated metal roof is a more durable, longer-lasting solution than a rubber roof for about the same price.
What is the best roof repair for older mobile home with an addition?
Hi Bill,
Thanks for the question. We suggest you register in our mobile home repair forum and ask your question there! There you can provide more details and images so you can get some useful advice on roofing materials.
We have a flat metal roof sunroom. Can we use it there?
Debra